T8S to L1 Model II
Connect the T8S to L1 Model II

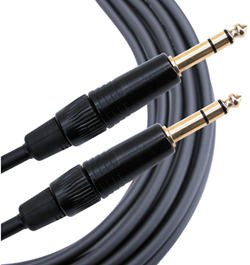
The output from the T8S ToneMatch mixer is a balanced mono 1/4 inch (6.3 mm) Tip-Ring-Sleeve and the input on the L1 Model II is a balanced mono 1/4 inch (6.3 mm) Tip-Ring-Sleeve so use a cable like this.
 .
.
1/4" TRS Balanced Patch Cable (audiopile.net)
Connect the ToneMatch Power Supply to the T8S ToneMatch mixer for power.
Set the L1 Model II Analog Input Trims to about 9:00 o'clock.
Gain Staging
For each L1 Model II
L1 Model II Analog Input
The Analog input is a 1/4 inch (6.3 mm) Tip-Ring-Sleeve balanced input jack.

Analog input trim (volume, or gain) control
Setting the trim level on the Model II Power Stand is a one-time step. Once you have matched the output of the ToneMatch mixer to the input of the L1 you don't need to adjust it again.

T4S/T8S ToneMatch Mixers
- Connect the source device Main Output to the L1 Model II Analog Input
- Set the Analog Input trim to 9:00 o'clock. Control the volume with the Master Volume on the ToneMatch mixer.
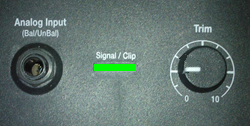
If you set the input trim higher, you will have excessive line noise. - If the Signal/Clip indicator glows red, decrease the Trim level so that it glows only green or yellow.

For third-party mixers
- Set the Trim control on the power stand to the 0 (zero) position.
- Connect the third-party mixer Main Output to the L1 Model II Analog Input
- Adjust the volume of the third-party Main Output to the reference or nominal output level.
- If the Signal/Clip indicator glows red, decrease the Trim level so that it glows only green or yellow.
