T1 ToneMatch® Audio Engine / Daisy Chain: Difference between revisions
mNo edit summary |
|||
| (8 intermediate revisions by the same user not shown) | |||
| Line 3: | Line 3: | ||
[[Image:T1x2IntoModelIIa.gif]] | [[Image:T1x2IntoModelIIa.gif]] | ||
In this example we have two {{T1}}s. (T1®s) | In this example, we have two {{T1}}s. (T1®s) | ||
#{{t1r}} on the left connected to the {{Model II}} through the [[ToneMatch® Port]] | #{{t1r}} on the left connected to the {{Model II}} through the [[ToneMatch® Port]] | ||
#{{t1r}}on the right connected to the {{t1r}} on the left through the Master Analog ¼ inch jack to the other T1® Channel 4 | #{{t1r}}on the right connected to the {{t1r}} on the left through the Master Analog ¼ inch jack to the other T1® Channel 4 | ||
Use a balanced (Tip-Ring-Sleeve) cable if possible. | |||
{{Balanced TRS | |||
|Input= {{T1}} Master Output | |||
|Output= {{T1}} Channel 4 or Channel 5 | |||
|discussion page = link to forum discussion (optional) e.g. discussion in the Bose Message Board | |||
}} | |||
If you use an unbalanced cable (Tip-Sleeve) between the first and second {{T1}}, you will have a lower signal to noise ratio than using a balanced cable (Tip-Ring-Sleeve). This means you will have more noise, and because you will have to turn up the volume on the second {{T1}} you will be amplifying the noise. | |||
This allows the performer using {{t1r}} #1 to control the overall volume of both T1®s. If the performer controlling T1® # does not adjust the volume of Channel 4, Changing the Master Volume maintains the relative balance between T1® #1 and T1® #2 | This allows the performer using {{t1r}} #1 to control the overall volume of both T1®s. If the performer controlling T1® # does not adjust the volume of Channel 4, Changing the Master Volume maintains the relative balance between T1® #1 and T1® #2 | ||
| Line 17: | Line 31: | ||
*It would be possible to have a third {{t1r}} connected to {{t1r}} #1 Channel 5 | *It would be possible to have a third {{t1r}} connected to {{t1r}} #1 Channel 5 | ||
*Related discussion in the message board [http://bose.infopop.cc/eve/forums/a/tpc/f/8146026354/m/4711091695 T1® Daisy Chain]<br> | *Related discussion in the message board [http://bose.infopop.cc/eve/forums/a/tpc/f/8146026354/m/4711091695 T1® Daisy Chain]<br> | ||
Here's how you can do the same thing with a {{Compact}} | |||
[[Image:T1 Daisy Chain to Compact.png]] | |||
In this example, we have two {{T1}}s. (T1®s) | |||
#{{t1r}} on the left connected to [[L1%C2%AE_Compact#Channel_2|Compact Channel 2]] | |||
#{{t1r}}on the right connected to the {{t1r}} on the left through the Master Analog ¼ inch jack to the other T1® Channel 4 | |||
This allows the performer using {{t1r}} #1 to control the overall volume of both T1®s. If the performer controlling T1® # does not adjust the volume of Channel 4, Changing the Master Volume maintains the relative balance between T1® #1 and T1® #2 | |||
<br> | |||
Notes:<br> | |||
*{{t1r}} #1 and #2 will require a [[T1 ToneMatch® Audio Engine power supply]] | |||
*It would be possible to have a third {{t1r}} connected to {{t1r}} #1 Channel 5 | |||
*Related discussion in the message board [http://bose.infopop.cc/eve/forums/a/tpc/f/8146026354/m/4711091695 T1® Daisy Chain]<br> | |||
<!-- | |||
Connect the second T1® to Compact Channel 2 | |||
So... | |||
first T1® | |||
1 - microphone | |||
2 - guitar | |||
4 - output from second T1® (Preset Utility Flat) | |||
Master Output goes to Compact Channel 2 | |||
second T1® | |||
1 - microphone | |||
2 - guitar | |||
Master Output of second T1® goes to first T1® Channel 4 | |||
This way each performer can have his/her own T1® and control his/her own mix. | |||
The first T1® controls the overall volume. | |||
--> | |||
---- | ---- | ||
| Line 23: | Line 78: | ||
[[Category:Stage_Layout]] | [[Category:Stage_Layout]] | ||
[[Category:T1]] | [[Category:T1]] | ||
[[Category:Daisy Chain]] | |||
Latest revision as of 03:49, 1 April 2020
You can daisy chain (connect) one T1 ToneMatch Audio Engine into another.

In this example, we have two T1 ToneMatch Audio Engines. (T1®s)
- T1® on the left connected to the L1 Model II through the ToneMatch® Port
- T1®on the right connected to the T1® on the left through the Master Analog ¼ inch jack to the other T1® Channel 4
Use a balanced (Tip-Ring-Sleeve) cable if possible.
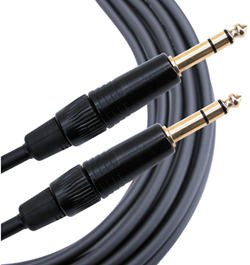
The output from the T1 ToneMatch Audio Engine Master Output is a balanced mono 1/4 inch (6.3 mm) Tip-Ring-Sleeve and the input on the T1 ToneMatch Audio Engine Channel 4 or Channel 5 is a balanced mono 1/4 inch (6.3 mm) Tip-Ring-Sleeve so use a cable like this.
 .
.
1/4" TRS Balanced Patch Cable (audiopile.net)
If you use an unbalanced cable (Tip-Sleeve) between the first and second T1 ToneMatch Audio Engine, you will have a lower signal to noise ratio than using a balanced cable (Tip-Ring-Sleeve). This means you will have more noise, and because you will have to turn up the volume on the second T1 ToneMatch Audio Engine you will be amplifying the noise.
This allows the performer using T1® #1 to control the overall volume of both T1®s. If the performer controlling T1® # does not adjust the volume of Channel 4, Changing the Master Volume maintains the relative balance between T1® #1 and T1® #2
Notes:
- T1® #2 will require the optional T1 ToneMatch® Audio Engine power supply
- It would be possible to have a third T1® connected to T1® #1 Channel 5
- Related discussion in the message board T1® Daisy Chain
Here's how you can do the same thing with a L1 Compact

In this example, we have two T1 ToneMatch Audio Engines. (T1®s)
- T1® on the left connected to Compact Channel 2
- T1®on the right connected to the T1® on the left through the Master Analog ¼ inch jack to the other T1® Channel 4
This allows the performer using T1® #1 to control the overall volume of both T1®s. If the performer controlling T1® # does not adjust the volume of Channel 4, Changing the Master Volume maintains the relative balance between T1® #1 and T1® #2
Notes:
- T1® #1 and #2 will require a T1 ToneMatch® Audio Engine power supply
- It would be possible to have a third T1® connected to T1® #1 Channel 5
- Related discussion in the message board T1® Daisy Chain