Template:B1 Cable Warning: Difference between revisions
mNo edit summary |
mNo edit summary |
||
| (5 intermediate revisions by the same user not shown) | |||
| Line 1: | Line 1: | ||
<noinclude>Warning - Use Blue | <noinclude>Warning - Use Blue NL4 cables that came with your {{B1}} or {{B2}} bass module</noinclude> | ||
<includeonly>''' Warning - Use Blue B1 Cables NL4 cables with your {{Classic}} | <includeonly>''' Warning - Use Blue B1 Cables NL4 cables with your {{Classic}} / {{Model I}} / {{Model 1S}} {{Model II}} '''</includeonly> | ||
{{Classic icon}}{{Model I icon}} | {{Classic icon}}{{Model I icon}} {{Model II icon}} {{B1 icon}} {{B2 icon}} | ||
If you are using a {{B1}} with your Power Stand it is ESSENTIAL for proper operation that you use the BLUE | If you are using a {{B1}} with your Power Stand it is ESSENTIAL for proper operation that you use the BLUE cable supplied with the {{B1}} or {{B2}}. This is required so that the {{Classic}}/{{Model I}}/{{Model 1S}}/{{Model II}} Power Stand can correctly identify when there are bass modules connected to it and if so, how many. | ||
{{B1 Cable}} | {{B1 Cable}} | ||
Please click the picture above for ordering information. | |||
;Note: The [[B2_Bass_Module#B2_Switching|B2 Bass Level Switch]] will not change the sound of the {{B2}} if you are not using the correct cable. | |||
See: [[PS1 Power Stand / Bass Line Out]] for details about how the Power Stand adapts to the number of bass modules are connected to it. | |||
| Line 17: | Line 22: | ||
[[Category:Classic]] | [[Category:Classic]] | ||
[[Category:Model I]] | [[Category:Model I]] | ||
[[Category:Model II]] | |||
[[Category:Model 1S]] | |||
[[Category:B1]] | [[Category:B1]] | ||
[[Category:B2]] | |||
[[Category:Bass]] | [[Category:Bass]] | ||
[[Category:Troubleshooting]] | [[Category:Troubleshooting]] | ||
</noinclude> | </noinclude> | ||
Latest revision as of 15:37, 9 October 2019
Warning - Use Blue NL4 cables that came with your B1 Bass Module or B2 Bass Module bass module
If you are using a B1 Bass Module with your Power Stand it is ESSENTIAL for proper operation that you use the BLUE cable supplied with the B1 Bass Module or B2 Bass Module. This is required so that the L1 Classic/L1 Model I/L1 Model 1S/L1 Model II Power Stand can correctly identify when there are bass modules connected to it and if so, how many.
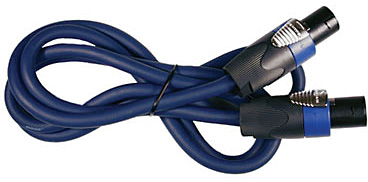
Please click the picture above for ordering information.
- Note
- The B2 Bass Level Switch will not change the sound of the B2 Bass Module if you are not using the correct cable.
See: PS1 Power Stand / Bass Line Out for details about how the Power Stand adapts to the number of bass modules are connected to it.
You may also use high quality NL4 cables (four conductor cables).
Alternate and longer cables for B1s